Dovecot with Apache SOLR in docker with SSL
I’ve been running my own mailserver for a while. This is not very common anymore and lots of people have problems with this due to MS and Google’s SPAM filters, lots of ISP’s blocking SMTP traffic and IP reputations of some ranges out there. I’m lucky enough that i primarily receive e-mail, have a provided that allows SMTP and have a reasonable IP address.
To read my e-mail, i run dovecot imap server and over the years my mail archive has become nearly 10gb of data. With that amount of data, search capabilities need to be more advanced then a simple grep on the maildir.
As I had some troubles getting it all to work, i figured it would be good to write down some notes.
Dovecot Full Text Search
Dovecot has a full text search option which is plugin based. There’s currently 3 plugins maintained by the dovecot team, of which one is their own Dovecot pro FTS engine. A Xapian based Flatcurve engine. And, the other option is Apache Solr. There are also a few community based plugins, but as I wanted to learn more about Apache Solr, i decided to take that option. If you’re running dovecot for an organization, i would highly recommend the dovecot pro option. It helps Open-xchange maintain the open source software and I believe they offer a good service.
Docker installation, first run and create core
Apache Solr is java software with lots of deployment options. For my personal use, a simple docker image would suffice. Again, for organizations, you’d have to do a lot more and Solr’s documentation is pretty good at explaining this.
First, we’re going to run Solr without any security and make sure we add a core for Dovecot. I use docker-compose for this, so the following docker-compose file can be used:
|
|
Please note the volume is a direct mapping to a local path, so you’ll have to adjust that. In the article, i’ll use data/dovecot/conf or other relative paths. In my case data/dovecot/ is under /data/docker/solr/data/data/dovecot/. This is because Solr makes a data directory and i keep my docker data in a data directory too.
After you’ve run docker-compose up make sure you can access http://ip-address:8983 to see the Solr admin interface. Then, open another shell and create a container with the following docker command:
|
|
Refresh the admin web ui and see if you can now spot the dovecot core in the dropdown menu on the left hand side.
Now that this is running, shut down the docker image with a docker-compose down.
We now have a basic Solr running and a container created.
Solr’s Schema and Config
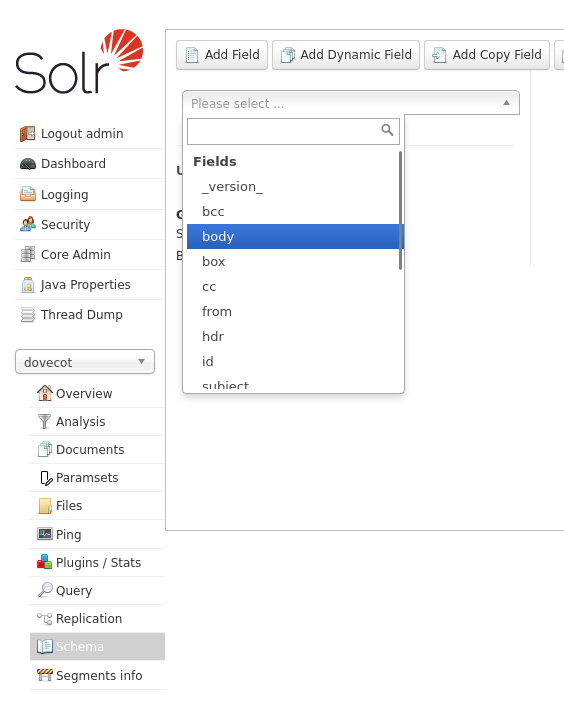
Solr uses schema’s to understand the content of what it is indexing. The schema tells Solr what the fields are (numbers, text, etc) and also allows you to search for specific fields (like example, the From field in your mails). Dovecot thus expects a specific schema, which they provide for you.
The schema can be downloaded from Dovecot’s git repository. There’s a schema for Solr 7 and Solr 9, so we’re going to take the schema for Solr 9. Download the file and call it schema.xml and place it into the data/dovecot/conf/ directory (this is partially why we mounted the volume).
You will also need to get the config file, which can be found at here. I personally had some issues with the file in the repository, so i used this version.
Place this config file in the same data/dovecot/conf/ directory and call it solrconfig.xml.
It’s a good idea to change permissions now, and for whatever reason the port and uid are the same for this docker image, so a chown -R 8983:8983 data/dovecot/conf/ should do the trick.
Re-start the docker container with a docker-compose up. During startup, it will read the files and put everything in the right place.
Once it’s running again, you should be able to open the admin interface and check that the schema for the dovecot core has been updated:
SSL, Authentication and Authorization
You might have noticed that you could access the Solr admin interface without any credentials or encryption. A search index (which is what Solr is) has copies of the data, so it means your mail does end up in this system. It doesn’t sound like a good idea to leave that unencrypted and unsecured, so we’re now going to add a self-signed certificate and add basic authentication to protect things.
SSL (I know, it’s TLS)
Unfortunatly i’m not a wizard with certificates and this runs on the same machine as my imap server, so a self-signed certificate is sufficient for me. To create the certificate the Solr documentation talks about a keytool. Don’t bother trying to find this tool, it’s installed in the docker image and you can use that version to generate a JKS (Java Key Store) file that Apache Solr needs.
Use the following commands (while the docker container is running):
|
|
Now, we can update our docker-compose.yml file to include these SSL settings:
|
|
You can now restart the docker container and you should get a TLS/SSL warning when you try to open up the admin interface. If you get weird characters, then please use httpS:// in front of the IP.
This is great, but still no username/password. To do that, add a security.json file to the data/ directory. The content of my file looks like this:
|
|
I initially generated my file using https://clemente-biondo.github.io as the encoded values were not clear to me. The page generates a basic authentication file with a solr user and the provided password. I change the solr user to admin and added some permissions. So my first security.json file looked like this:
|
|
I then restarted the docker container and added the dovecot user (and permissions) in the admin UI.
When you create this security.json file, please don’t forget to set the ownership (chown 8983:8983 security.json) and the permissions (chmod 0650 security.json) as the file can be used to gain access to Apache Solr.
This should be it from a Apache Solr setup perspective, it’s now over to Dovecot config files to make it use the full text search.
Dovecot config
I run debian, so i had to apt install dovecot-solr to add the solr plugin. I then had to modify /etc/dovecot/conf.d/90-plugin.conf and added the following:
mail_plugins = $mail_plugins fts fts_solr

plugin {
  fts = solr
  fts_autoindex = yes
  fts_solr = url=https://dovecot:password!@127.0.0.1:8983/solr/dovecot/
}
ssl_client_require_valid_cert = no
This simply tells dovecot to load the fts and fts_solr plugins and to use it. The URL needs your username/password to access Solr and the core created earlier (dovecot in the URL path).
The ssl_client_require_valid_cert = no is needed because we created a self-signed certificate and dovecot cannot verify the validity of it. For me personally, because everything is running locally, this is fine - but in production this would need to be different. The setting should only change the certificate check for dovecot’s outbound connections.
The fts_autoindex = yes means that when a mail is received or deleted, that the index is updated directly.
After this, restart dovecot.
You’ll have to rescan/index your mailboxes. You can do that using the following commands:
doveadm fts rescan -u <username>
doveadm index -u <username> -q "*"
The indexing will happen in the background, and you should see some progress on the overview page of the dovecot core in the Solr admin UI.
Testing
You can of course use a mailclient to test this, but there’s also a doveadm command to test things, an example would be doveadm search -u <username> FROM person. You should then see lines like the following in the docker-compose logs:
solr_1 | 2023-09-16 13:09:37.864 INFO (qtp948115224-20) [ x:dovecot] o.a.s.c.S.Request webapp=/solr path=/select params={q={!lucene+q.op%3DAND}from:person&fl=uid,score&sort=uid+asc&fq=%2Bbox:8faddf8as80f98safdasf+%2Buser:username&rows=361257&wt=xml} hits=13 status=0 QTime=3
The doveadm command should output a bunch of ID’s, which are matches to the search query.
Concluding
It was a bit difficult to find all the info I needed to set things up. In the end, we have a docker container for apache Solr, store our data on a specific location on disk, have a SSL certificate so the basic-authentication is reasonable secure, and we have it protected with a username/password. Dovecot is connected and mail has been indexed. More importantly, we have fast search!