K2's Custom Event Notification - Twitter
The K2 BlackPearl platform as it stands today is a large platform with a lot of out of the box functionality. When using out of the box products, I always fear that it might be too limited. When doing K2 projects I sometimes hit those boundaries, but I’m always able to use one of K2’s extension options to help me out. A custom action for the Event Bus (what this blog post is about) is just one of the possibilities.
The Event Bus/Scheduler itself is an impressive piece of architecture. You can read about it in chapter 21 of the Professional K2 BlackPearl book. The event bus is used to perform an action when a specific event occurs within K2. With the K2 workspace you’re able to subscribe to those events. This extension provides you the ability to add your own assembly with static method and call that based on the event that occurred within K2.
Example code
To make a small example, I’ve written a class with two static functions that use the Twitterizer API to communicate with Twitter. Although Jonathan King has got some more integration with Twitter, this seems to be a simple/good example for the Event Bus:
using System;
using System.Collections.Generic;
using System.Text;
using Twitterizer.Framework;
using System.Configuration;
using SourceCode.EventBus.Utils;

namespace TwitterCustomActionEvent
{
    public class SendTweets
    {
        private static Twitter CreateTwitter()
        {
            AssemblySettings settings = new AssemblySettings();

            string proxyUrl = settings["ProxyUri"] as string;
            string username = settings["TwitterUsername"] as string;
            string password = settings["TwitterPassword"] as string;

            if (string.IsNullOrEmpty(username) || string.IsNullOrEmpty(password)) {
                throw new ArgumentException("The username and password should be supplied by the Application Configuration file.");
            }

            Twitter twit;

            if (string.IsNullOrEmpty(proxyUrl)) {
                twit = new Twitter(username, password, "K2 Notifications");
            } else {
                twit = new Twitter(username, password, "K2 Notifications", proxyUrl);
            }

            return twit;
        }

        public static void SendTweet(string text)
        {
            Twitter twit = CreateTwitter();
            twit.Status.Update(text);
        }

        public static void DirectMessage(string toUser, string text)
        {
            Twitter twit = CreateTwitter();
            twit.DirectMessages.New(toUser, text);
        }
    }
}
As you can see, there are 3 methods. Only the Public static methods are seen by the K2 Custom Event Wizard. The private method instantiates the Twitter API and uses the AssemblySettings class to get some configuration settings. The two public methods simply send a Direct Message to a twitter user or send out a simple tweet (status update).
In the CreateTwitter() method, a AssemblySettings object gets initialized. This object can be found in the SourceCode.EventBus.Utils namespace and allows simple configuration files to be loaded. A sample of that config:
<configuration>
	<appsettings>
		<TwitterUsername>username</TwitterUsername>
		<TwitterPassword>password</TwitterPassword>
		<ProxyUri/>
	</appsettings>
</configuration>
Although it might look like a normal application configuration file (.config), it is not! Normally you would see ‘add’ nodes in the appSettings list. The AssemblySettings class reads the the XML and parses it. Be sure to use ‘appSettings’ in lowercase, as the xml parsing is case sensitive.
The SendTweet and DirectMessage methods simply send calls the Twitterizer API.
The above class is put into a signed class library project.
Installing the Custom Event
After you have build this class, create a folder in C:\Program Files\K2 BlackPearl\Host Server\Bin, or whatever directory you’ve installed K2 into.
In my case, I’ve named the directory ‘twitter’ and placed 3 files:
- TwitterCustomActionEvent.DLL
- TwitterCustomActionEvent.DLL.config
- Twitterizer.Framework.dll
As you can see, also placed the referenced assemblies in the same folder, and create a config file that’s the same name as the DLL, with .config after it.
Now, open up the SourceCode.EventBus.Assemblies.config file located in the Host Server\bin folder. This file is a simple configuration file so the K2 server knows which assemblies it can use for Actions in the Event Notification. Simply add a assembly line, give it a Displayname and locate the Assemly that it sould use. Mine looks like this:
<configuration>
	<appsettings>
		<assemblies>
			<assembly displayname="EventAssemblies" fullname="c:\program files\k2 blackpearl\Host Server\Bin\SourceCode.EventBus.EventAssemblies.dll" />
			<assembly displayname="TweetAssembly" fullname="c:\program files\k2 blackpearl\Host Server\Bin\twitter\TwitterCustomActionEvent.dll" />
		</assemblies>
	</appsettings>
</configuration>
Configure the Action Subscription
After this, restart the K2 hostserver and go to the K2 workspace. Open up the Notification events menu and select. On the screen that opens,click New event in the bottom right hand corner.
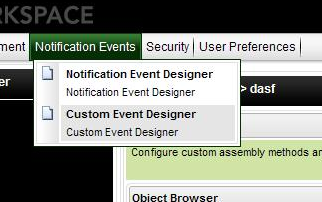
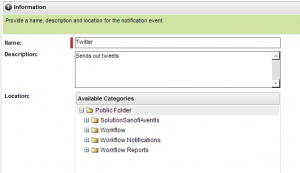
Enter a name and description, select next.
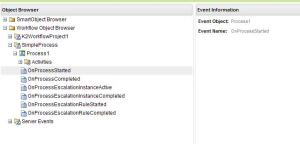
Now, you get a screen where you can select the event you want to subscribe to, in this case, I’ve selected the OnProcessStarted event.
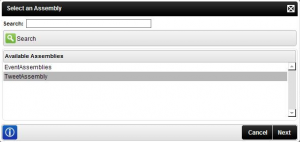
Time to select the action, this is done by first selecting the assembly. Click search and get all of them, including the one you’ve just added.
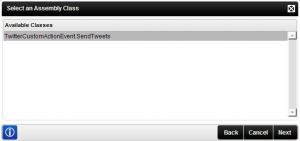
Click next and select the class you want to use. In this example, TwitterCustomActionEvent.SendTweets.
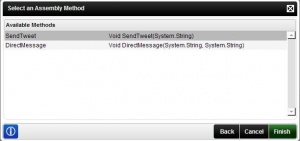
Click next to select the Method you want to use, I’m going to do ‘SendTweet’, finally click finish.
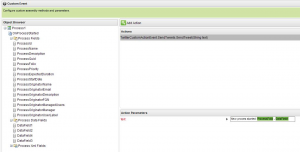
As you can see, the screen is updated and you are now able to add Action Parameters. Simply select data from the left object browser and drag them into the Text field. You can add extra text if you want too.
After that, click finish and you’re done! Start the process and see your twitter happening!
